Setup VSCode to Edit Files in the ROS2 Docker Container
Prepared by Qingqing Ni
Info
This allows you to edit files inside the ros2_humble Docker container directly from the Ubuntu VM.
1. Install VS Code
Download the .deb installer from VScode download page.
Choose the correct architecture:
- ARM64 for an ARM-based Ubuntu VM running on macOS (Apple Silicon)
- x64 for an Intel/AMD Ubuntu VM running on Windows and macOS (Intel processors)
Install it with:
Tip
You can drag and drop the .deb file onto the terminal instead to have its path automatically filled in.
Launch VS Code:
2. Install the Required Extensions
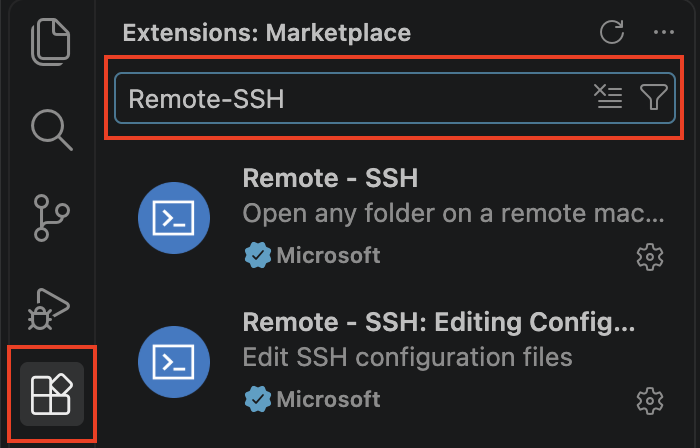
In VS Code, install the following extensions:
- Remote - SSH
- Dev Containers
3. Configure SSH
Info
If you've already set up the SSH shortcut, you should have ~/.ssh/config set up, you can skip this step.
Make sure ~/.ssh/config contains:
For example, if you are using the default nickname car, on car number 2, the entry would be:
Test the connection:
Warning
Do not use car-ros for VS Code Remote SSH if it contains a RemoteCommand. Use car instead.
4. Connect VS Code to the Raspberry Pi
Launch VS Code and press:
Select:
Tip
You can type in Remote-SSH: ... to find the option.
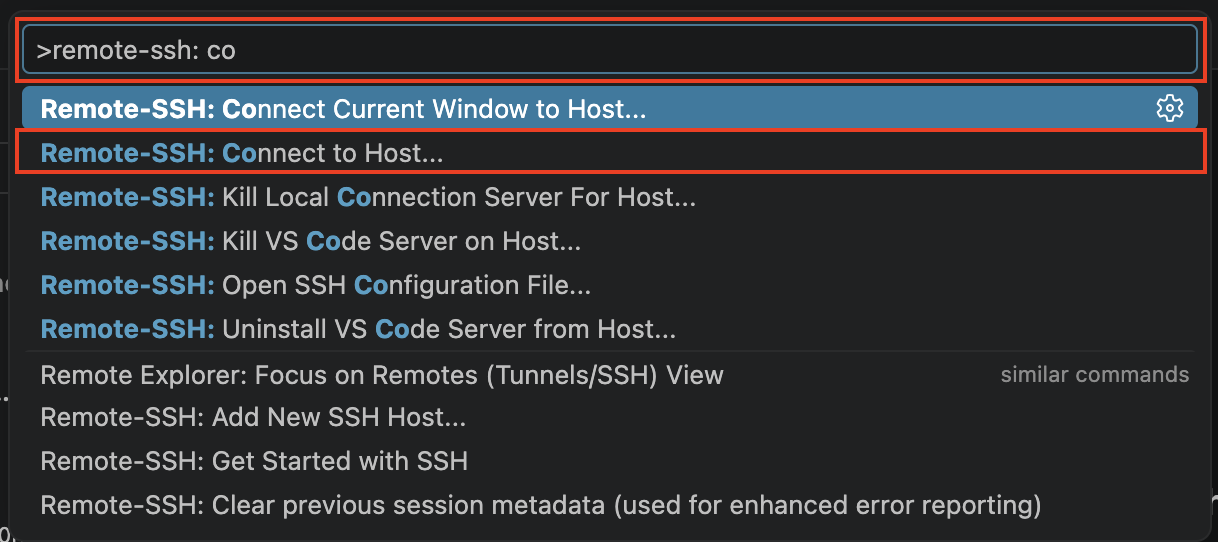
Then select:
VS Code will automatically install its remote server on the Raspberry Pi. This might take a while.
Once connected, the bottom-left corner of VS Code should show:
5. Start the ROS 2 Container
Make sure the ROS 2 container is running, or you can open a terminal in VS Code and run:
6. Attach VS Code to the Container
Press:
Select:
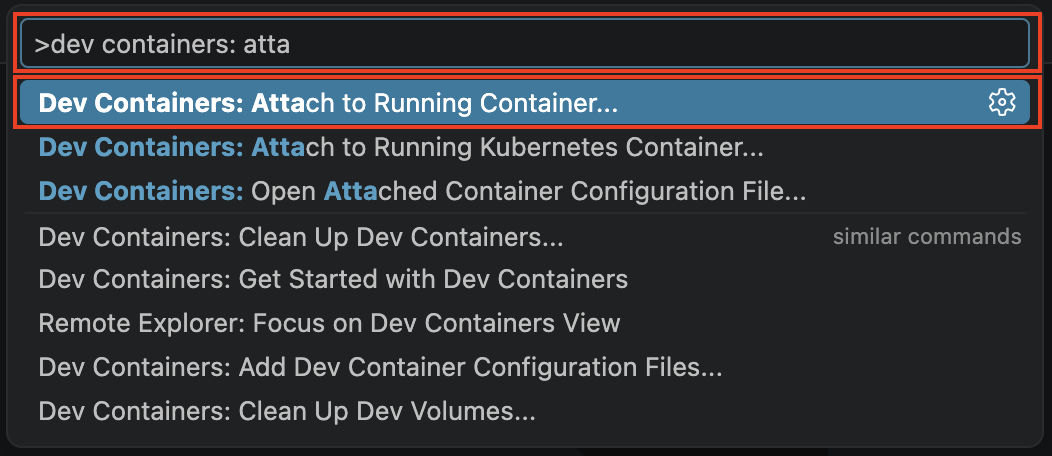
Then select:
VS Code will automatically install its remote server inside the container. This might take a while.
Once connected, the bottom-left corner of VS Code should show:
7. Open the ROS 2 Workspace
Go to:
Open:
You can now directly view, edit, and save files inside the Raspberry Pi's ROS 2 container.
For example:
Changes are saved directly inside the container.
8. Troubleshooting
8.1 VS Code Fails to Launch on VM
If VS Code fails to launch, open a terminal window on your VM and run:
From the log, if you see:check the available storage:
If the available storage is low, you can try deleting some files or increasing the storage size.
To safely clear the cache and system logs, run:
Other possible solutions include:
- Increase the storage size of the VM from VMWare
- Delete unused files
- Clear Trash
8.2 Failed to Install VS Code Server
If VS Code reports unable to install the server on the Raspberry Pi or the Docker container:
Check the available storage on the Raspberry Pi and the Docker container. The same command from 8.2 works for both.